Using the Content Editor
The Content Editor is a web form that you use to create, edit and delete your content. A given content type (e.g. blog vs. article) can have additional fields specific to that type, but the behavior of the editor is fundamentally the same across all content types.
Before we discuss the editor, we need to understand some DevX content management concepts. A content item always has a Title (in the case of a FAQ, this is called a Question). The Body is the main part of the content; that is, the main blog content, or main article content etc. The Teaser is the excerpt of the body that is shown on summary pages, e.g. in The Latest section on the front page. The Teaser is usually a chunk of the start of the content. The exact size of the Teaser can be specified by the author, or if not specified, will be automatically calculated.
If a content item is to be "featured", that is, if it is to be displayed in the carousel, then it must also have a Cover Image that represents the content. It also must have a Short Teaser, which is text less than 100 characters in length, such that the text can be displayed in the carousel. The Short Teaser cannot be automatically generated, it must be specified by the author. Note that whether a content item is "featured" is an editorial decision by the Channel Owner or DevX Owner, not an automatic feature of the site.
Blog Editor
Let's start with one of the simplest content types, the blog entry. Click the Create Blog Entry link in the Contribute sidebar.

From the top, let's look at each field.
- Title: The title of the content.
- Short Teaser: Less than 100 characters of text, providing a very quick description of the content. Not required if this content will not be featured.
- Cover Image: An image representing the content, to be displayed if the item is featured. Not required if this content will not be featured. Select the image using the Browse button, then click Upload to send the image to DevX.
- Tags: A comma-separated list of keywords for this content, used to help navigate and search the site. Note that a "keyword" can have spaces (but try to minimize this), and note also that the Tags field has an "auto-suggest" feature that will display matching terms that have already been used.
- Body: The body is the main content, and the body editor is a full Rich Text Editor (RTE) with styles, images, etc. We'll discuss this in more detail later, but for now note (in the image above) the horizontal red separator in the RTE text. This line was inserted by clicking the Teaser button in the RTE toolbar. The text above the separator is the teaser text. The teaser text is also part of the main body text, but if you wish to have a distinct teaser (not part of the body text), then uncheck the Show summary in full view checkbox above the RTE. Note also that if prefer a simpler editor, you can click the Switch to plain text editor link.
- File Attachments: You can attach files to your content, e.g. a zip file with source code etc. These attachments will then appear in a sidebar when your content is displayed.
- Revision Information: When saving changes, you can optionally add a revision message, e.g. "Fixed typo in 2nd paragraph".
And obviously the Preview button allows you to see your work before it gets published, and the Save button does the obvious. After clicking save, your work is now published.
Differences in other editors
The Content Editors for other content types have some additional fields.
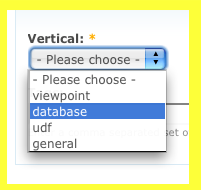
The Article, Reference, FAQ, and Download editors each have a Vertical drop-down menu (a Vertical is the technical name for a Channel). That is, when creating one of these content types, e.g. an Article, you must also select the channel that the content belongs too. This field is required.
Download
See the Downloads page.
In the next section, we'll learn how to use the Rich Text Editor.